

Tuesday, 8 May 2012
Papercut wedding card
One of my old school friends got married on Friday. I wanted to make them a wedding card that was unique to them so decided to try a papercut based on some designs I'd seen on Etsy. Wasn't exactly sure of their colour scheme but went for bright purple which turned out to be the same colour as the bridesmaid dress!
Sunday, 15 April 2012
Scrabble cushions
I've finally finished the scrabble cushions! It may have taken a few months (since August!) but they are now finished and will be taking their places on my sister's window seat as soon as she's finished the seat.
In order to get an authentic Scrabble font I enlarged some pictures I found of the original scrabble cushions and cut the letters and numbers out from them. The cushion pads are very cheap cushions from Ikea and the cover was made from Ikea white fabric. The numbers and letters are black felt. Each cushion is double sided so there are double the letters to play with....

Turn over the S and the T and you get...

Turn over the A and you get a W...

Turn over the E and you get an I...

They'll provide hours of entertainment at my sister's house as they try and work out all the words you can spell with them. Now I might have to make a set for me....
Thursday, 16 February 2012
Wedding anniversay papercut
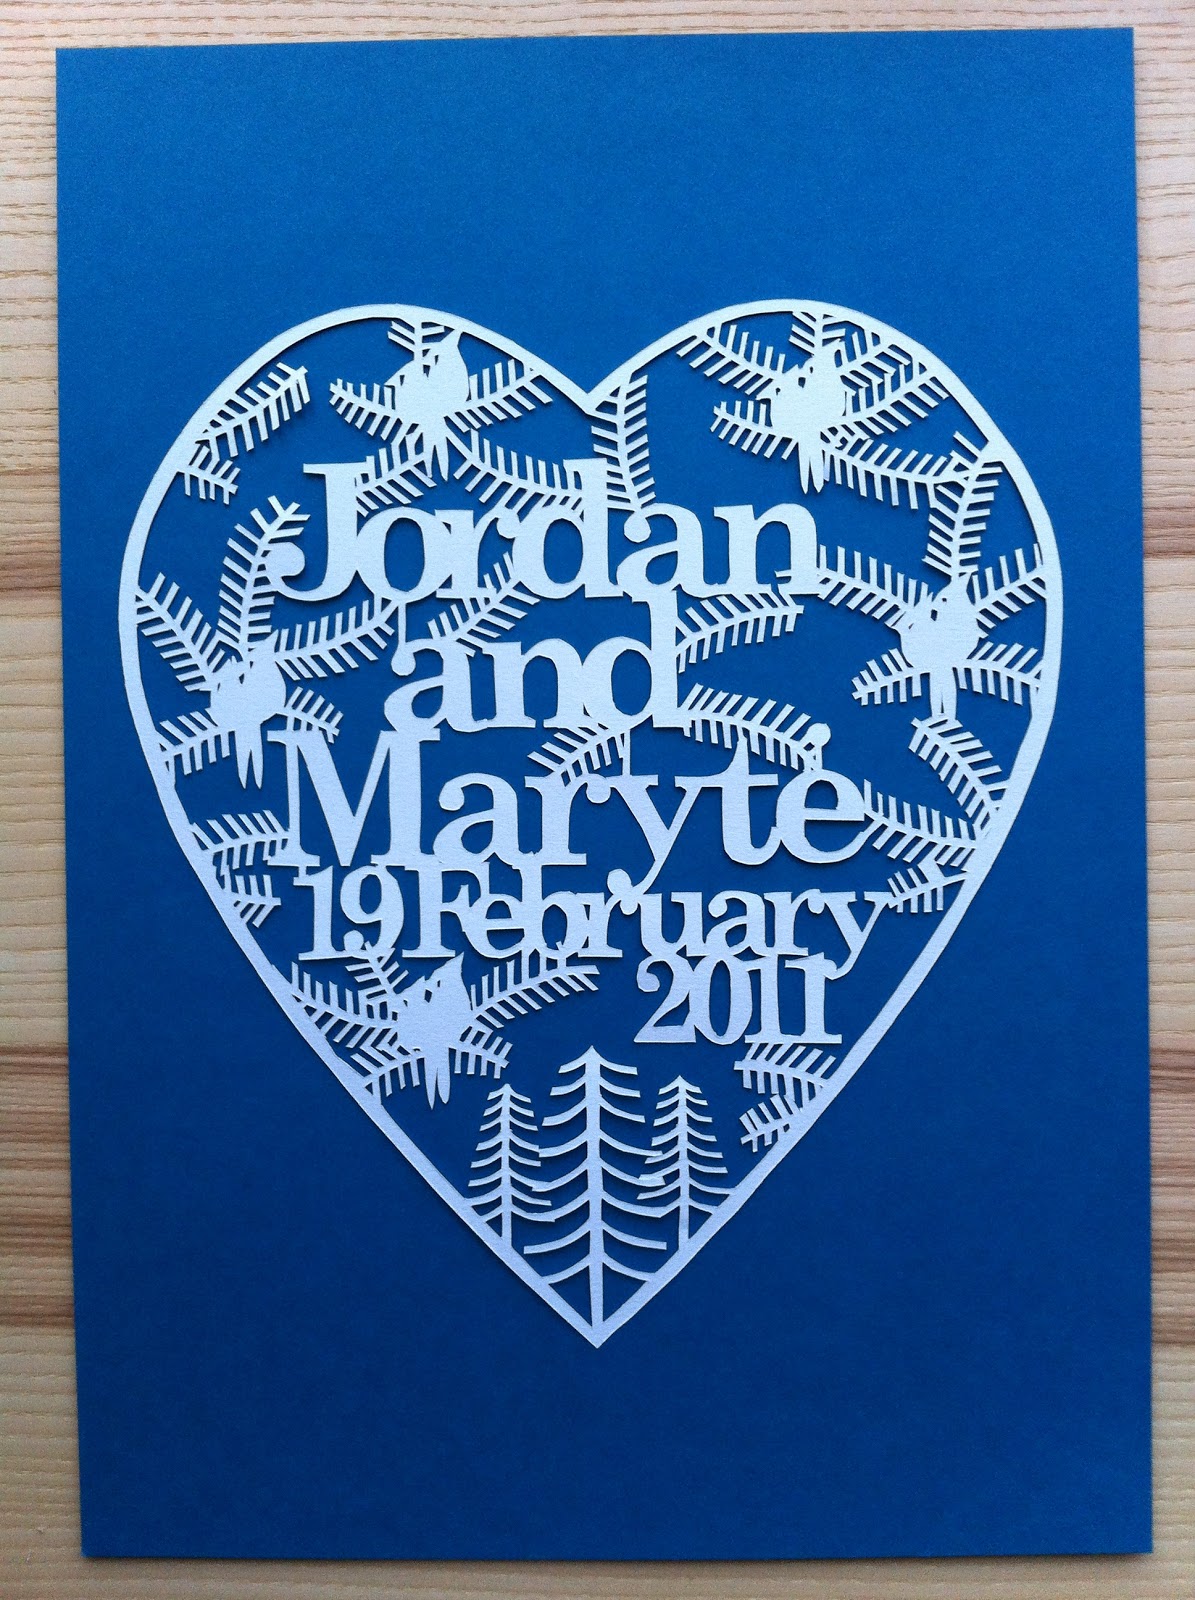
Last year I was a bridesmaid for a friend's wedding over in Canada. It was a great day and a beautiful wedding. It's just coming up to their 1st wedding anniversary and I wanted to make them a special present out of paper (the traditional 1st anniversary gift!). After downloading Inkscape for free I started playing around with some designs for a papercut. When I had the final design I reversed the image and printed it on to some nice white paper. I then started cutting out the design...
 After a few hours (and a severely dented finger from pressing too hard on the knife!) it turned out like this...

I managed to find some card the same colour as our bridesmaid's dresses. Although I haven't actually mounted it on to the card as I wasn't sure if the colour would go in their house!
The bride's brother had created their wedding stationery and designed 2 birds that featured on everything (including the cake!). I couldn't do a papercut without including them - in the end I put them everywhere! At their reception they had loads of Christmas trees so I put a few at the bottom of the heart.

It's in the post now on the way to Canada. Hopefully they'll both like it!
Monday, 13 February 2012
Letter 'R' tote bag
It was my friend's birthday at the weekend and I couldn't find anything to get her so I decided to decorate a plain tote bag that I'd got from Hobby Craft. The bag looked a bit boring with just the letter on it so I put some buttons on the letter and also at the bottom of the straps.


She loved the bag and used it to carry all her other presents home! I've got 2 more plain bags to decorate so watch this space to see what I do with them!
Tuesday, 3 January 2012
Papercut butterfly pictures
I made a lot of these papercut butterfly pictures for Christmas presents this year. I found some great square box frames in Debenhams that meant I could make the butterfly wings stand out from the background so they look 3d. Think my favourite one is the bright red butterfly. It will look great in my sisters' red and white bedroom!


Thursday, 15 December 2011
Butterfly papercut notebook
We're doing Secret Santa again at work this year. I had £1 left of my budget and couldn't find much under £2 in central London apart from this cheap notebook in Paperchase (although it was £1.50... I know, 50p over budget!). So I decided to cut a little butterfly to decorate the front and make it look pretty. I hope she likes it and doesn't guess too quickly who gave it to her. 
Sunday, 27 November 2011
Papercut Christmas card
Inspired by the laser cut christmas cards in Paperchase I decided to make my own version. Not a card for mass production as it took 4 hours to make!
I designed it on corel draw, flipped the image and then printed it on to card so I could cut it out from the back so you wouldn't see the lines. I'd forgotten how hard it is to cut card with a knife - it would probably have been easier to cut it from paper and glued it on the card.
Now I just gave to decide who to give it to!
Subscribe to:
Posts (Atom)

